- INTRODUCTION
- STEP 1: DOWNLOADING TREZOR BRIDGE
- STEP 2: CONNECTING TREZOR
- STEP 3: VERIFYING CONNECTION
- Confirming successful pairing of Trezor with Exodus wallet
- Importing assets and balances from Trezor to Exodus
- Reiterating that Exodus has zero control over Trezor wallet
- Reminder to never reload Trezor recovery phrase into Exodus
- Highlighting the need to keep recovery phrase and seed on the Trezor device
- STEP 4: SENDING AND RECEIVING CRYPTO
- Selecting Trezor as the hardware wallet within Exodus
- Accessing the wallet and choosing the desired asset for sending or receiving
- Plug Trezor in for transaction confirmation
- Differentiating between Trezor wallet address and Exodus wallet address
- Confirming the need to have Trezor device plugged in to send transactions
- FAQS
- Can I connect Trezor to Exodus without downloading Trezor Bridge?
- What happens if I reload my Trezor recovery phrase into Exodus?
- Are my private keys safe when connecting Trezor to Exodus?
- Can I use Exodus separately from Trezor Suite after connecting?
- Where can I purchase a Trezor device and find exchange deposit bonuses?
INTRODUCTION
Connecting your Trezor hardware wallet to the Exodus wallet app can provide several benefits. Firstly, Exodus and Trezor have an official partnership, which ensures a seamless integration between the two platforms. By connecting your Trezor to Exodus, you can leverage the unique features offered by the Exodus wallet.
To get started, it is important to note that you need to download the Exodus wallet separately from the Trezor suite. While the process of setting up Exodus is different from the Trezor device, it is a straightforward process that can be easily followed by referring to a step-by-step guide. You can view our Exodus Tutorial : setting up and using exodus wallet.
Once you have both Exodus and Trezor set up on your computer, you can connect your Trezor to Exodus by accessing the settings in the top right-hand corner of the Exodus wallet. From there, you can install the Trezor bridge if you haven’t done so already. This bridge facilitates the connection between your Trezor and Exodus.
By connecting your Trezor to Exodus, you can securely manage your cryptocurrency assets. Exodus does not have access to your private keys stored on your Trezor device, ensuring the safety of your funds. Additionally, Exodus allows you to easily send and receive crypto within the wallet, with the option to select your Trezor as the preferred hardware wallet.
To get more in-depth info, you can also read our Best Cold Wallet available on the market today.
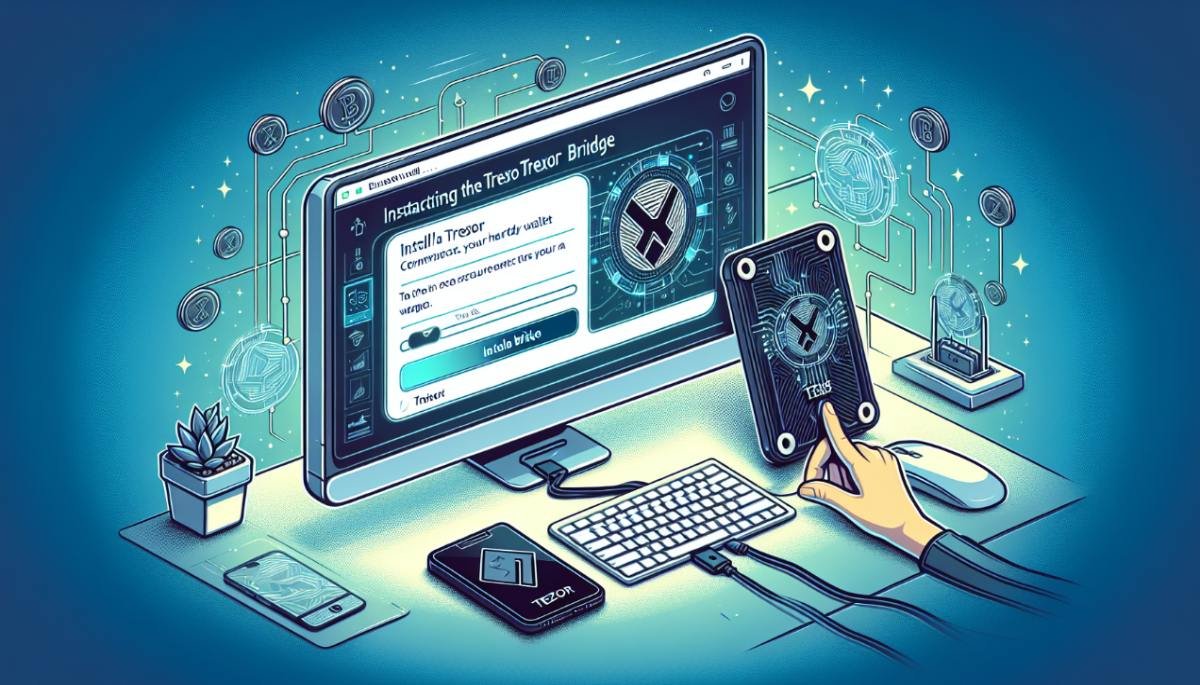
STEP 1: DOWNLOADING TREZOR BRIDGE
To connect your Trezor hardware wallet to the Exodus wallet, follow these steps:
Navigating to the settings in the Exodus wallet
Click on the settings option in the top right-hand corner of the Exodus wallet. This will open the settings menu.
Clicking on the ‘Devices’ tab and installing Trezor Bridge
Once in the settings menu, click on the ‘Devices’ tab. Here, you will find the option to install Trezor Bridge if you haven’t done so already. Click on the ‘install Trezor Bridge’ button.
Guide to downloading the latest Trezor Bridge from the official website
Upon clicking the ‘install Trezor Bridge’ button, your default browser will open and take you to the official Trezor website. Double-check that the URL is the official Trezor site before proceeding.
On the Trezor website, look for the ‘download latest Bridge’ button and click on it. This will start the download of the Trezor Bridge installer file.
Instructions to install Trezor Bridge on the user’s system
Once the Trezor Bridge installer file is downloaded, locate the file on your system and run it. Follow the on-screen instructions to install Trezor Bridge.
After the installation is complete, return to the Exodus wallet and navigate back to the settings menu.
At this point, the ‘Devices’ tab should have changed to ‘detect Trezor.’ If it hasn’t, close the Exodus app and reopen it. You may also need to go back to the main page and let the Exodus app refresh before going back to settings.
With ‘detect Trezor’ now visible, you can proceed to connect your Trezor to Exodus by plugging it into your computer.
Follow the prompts on both the Exodus wallet and the Trezor device to establish the connection. Trezor may ask you to enter your Trezor’s PIN number and passphrase.
Once the connection is established, your Trezor assets will be imported into the Exodus wallet. Allowing you to securely manage your cryptocurrency.
What are the best 6 ways to store your crypto ?
STEP 2: CONNECTING TREZOR
If you cannot see the ‘Detect Trezor’ option in the Exodus app, you may need to reload the app. Close Exodus and reopen it to see if the option appears. You can also try refreshing the app by going back to the main page before returning to the settings menu.
Once you have the ‘Detect Trezor’ option visible, you can proceed to connect your Trezor device to Exodus. Plug in your Trezor hardware wallet to your computer using the provided USB cable.
On the Trezor device, enter your PIN number using the keypad. This is an additional layer of security to ensure only authorized access to your wallet.
Back in Exodus, click on the ‘Detect Trezor’ option to establish the connection between your Trezor device and Exodus. This will prompt Exodus to communicate with your Trezor and import your Trezor assets.
On the Trezor device, you may be asked to accept the connection with Exodus. Verify the connection details on the device’s screen and confirm the connection.
It is important to note that during this process, your private keys remain secure on your Trezor device. Exodus does not have access to your private keys, ensuring the privacy and security of your cryptocurrency.
Once the connection is established and the Trezor assets are imported into Exodus, you can securely manage your cryptocurrency within the Exodus wallet. You can easily send and receive crypto, with your Trezor serving as the preferred hardware wallet.
Remember, it is crucial to never reload your Trezor recovery phrase into Exodus. Keeping your recovery phrase and seed on your Trezor device is essential to maintain the security and control of your hardware wallet.
STEP 3: VERIFYING CONNECTION
After successfully pairing your Trezor with the Exodus wallet, it is important to verify the connection to ensure a seamless integration.
Confirming successful pairing of Trezor with Exodus wallet
Check that your Trezor is successfully paired with the Exodus wallet by ensuring that all assets and balances from your Trezor are imported into Exodus.
Importing assets and balances from Trezor to Exodus
Verify that all your cryptocurrency assets and balances from your Trezor are visible in the Exodus wallet. This confirms that the connection is established and functioning correctly.
Reiterating that Exodus has zero control over Trezor wallet
Remember that even though your Trezor is connected to Exodus, Exodus has zero control over your Trezor wallet. All private keys remain securely stored on your Trezor device, ensuring the safety and control of your funds.
Reminder to never reload Trezor recovery phrase into Exodus
It is crucial to never reload your Trezor recovery phrase into Exodus. Doing so can compromise the security of your hardware wallet and turn it into a software wallet. Always keep your recovery phrase and seed on your Trezor device.
Highlighting the need to keep recovery phrase and seed on the Trezor device
Emphasizing the importance of keeping your recovery phrase and seed on your Trezor device ensures that you maintain the highest level of security for your cryptocurrency assets. Storing this information on the Trezor device prevents unauthorized access and protects your funds.
STEP 4: SENDING AND RECEIVING CRYPTO
To send and receive crypto using your Trezor hardware wallet within Exodus, follow these steps:
Selecting Trezor as the hardware wallet within Exodus
Open the Exodus wallet and navigate to the wallet section. Make sure that your Trezor is selected as the preferred hardware wallet. This ensures that your transactions will be processed through your Trezor device.
Accessing the wallet and choosing the desired asset for sending or receiving
Select the asset you wish to send or receive within the Exodus wallet. Ensure that the asset is compatible with your Trezor device.
Plug Trezor in for transaction confirmation
Before sending or receiving crypto, make sure that you plug your Trezor device into your computer. Device will confirm transactions to ensure the security of your funds.
Differentiating between Trezor wallet address and Exodus wallet address
When receiving crypto, make sure to use the wallet address provided by your Trezor device. This address is different from the wallet address within the Exodus wallet. Verify the address on your Trezor device to ensure accuracy.
Confirming the need to have Trezor device plugged in to send transactions
In order to send transactions, your Trezor device must be plugged in and connected to Exodus. This is necessary to confirm the transaction and sign it with your private keys stored on the Trezor device.
What are the worst 9 crypto mistakes not to make ?
FAQS
Here are some frequently asked questions about connecting Trezor to Exodus:
Can I connect Trezor to Exodus without downloading Trezor Bridge?
No, you need to download and install Trezor Bridge to connect your Trezor hardware wallet to Exodus. Trezor Bridge facilitates the connection between your Trezor and Exodus.
What happens if I reload my Trezor recovery phrase into Exodus?
Reloading your Trezor recovery phrase into Exodus is not recommended. Doing so can compromise the security of your hardware wallet and turn it into a software wallet. Always keep your recovery phrase and seed on your Trezor device.
Are my private keys safe when connecting Trezor to Exodus?
Yes, your private keys remain securely stored on your Trezor device when connected to Exodus. Exodus does not have access to your private keys, ensuring the privacy and security of your cryptocurrency.
Can I use Exodus separately from Trezor Suite after connecting?
Yes, you can still use Trezor Suite separately from Exodus. Connecting Trezor to Exodus allows you to securely manage your cryptocurrency assets within the Exodus wallet, but you can continue to use Trezor Suite for other functions.
Where can I purchase a Trezor device and find exchange deposit bonuses?
You can purchase a Trezor device from the official Trezor store. The link is provided in the description. Additionally, the store may offer exchange deposit bonuses, which you can find more information about on the official Trezor website.
Additionaly, you can check our Wallet of Satoshi tutorial and see if it is the right one for you.
EXCHANGE CRYPTO AND GET $50 FREE !
GET $50 FOR FREE IN YOUR SIMPLESWAP ACCOUNT!1 – Just sign up to SimpleSwap through this link
2 – Finish a crypto exchange using our exclusive promo code : u5bz3pBhYsMdeZYt
3 – Find $50 in BTC in your Customer Account !